KWin Effects
Project Structure
Declarative effects require some particular project structure that we need to learn first before writing any code
└── package
    ├── contents
    │   └── ui
    │       └── main.qml
    └── metadata.json
The package directory is a toplevel directory, it should contain two things: a metadata.json file and a contents directory. The metadata.json file contains information about the name of the effect, what API it uses, the author, etc.
{
    "KPackageStructure": "KWin/Effect",
    "KPlugin": {
        "Authors": [
            {
                "Email": "user@example.com",
                "Name": "Name"
            }
        ],
        "Category": "Appearance",
        "Description": "Yo",
        "EnabledByDefault": false,
        "Id": "hello-world",
        "License": "MIT",
        "Name": "Hello World"
    },
    "X-KDE-Ordering": 60,
    "X-Plasma-API": "declarativescript"
}
The contents directory contains the rest of QML code, config files, assets,
etc. Keep in mind that ui/main.qml is a “magical” file, it acts as an entry
point, every effect must have it.
In order to install the effect and make it visible in Desktop Effects settings, you will need to run the following command
kpackagetool6 --type KWin/Effect --install package/This is quite a lot to memorize. That’s why kwin provides an example qtquick
effect that you can grab, tweak some metadata and you’re good to go. You can
find the example project in the KWin repository.
Note that the example project also contains a CMakeLists.txt file, which
provides an alternative way to install the effect by the means of cmake, i.e.
make install or cmake --install builddir.
Hello World
Let’s start with an effect that simply shows a hello world message on the screen:
import QtQuick
import org.kde.kwin

SceneEffect {
    id: effect

    delegate: Rectangle {
        color: "blue"

        Text {
            anchors.centerIn: parent
            color: "white"
            text: "Hello world!"
        }
    }

    ScreenEdgeHandler {
        enabled: true
        edge: ScreenEdgeHandler.TopEdge
        onActivated: effect.visible = !effect.visible
    }

    ShortcutHandler {
        name: "Toggle Hello World Effect"
        text: "Toggle Hello World Effect"
        sequence: "Meta+H"
        onActivated: effect.visible = !effect.visible
    }

    PinchGestureHandler {
        direction: PinchGestureHandler.Direction.Contracting
        fingerCount: 3
        onActivated: effect.visible = !effect.visible
    }
}
import QtQuick is needed to use basic QtQuick components such as Rectangle.
import org.kde.kwin imports kwin specific components.
The SceneEffect is a special type that every declarative effect must use. Its
delegate property specifies the content for every screen. In this case, it’s a
blue rectangle with a “Hello World!” label in the center.
The ShortcutHandler is a helper that’s used to register global shortcuts.
ShortcutHandler.name is the key of the global shortcut, it’s going to be used
to store the shortcut in the config and other similar purposes.
ShortcutHandler.text is a human readable description of the global shortcut,
it’s going to be visible in the Shortcuts settings.
The ScreenEdgeHandler allows to reserve a screen edge. When the pointer hits that screen edge, some code can be executed by listening to the activated signal.
The PinchGestureHandler and SwipeGestureHandler allow to execute some code when
the user makes a pinch or a swipe gesture, respectively.
effect.visible = !effect.visible toggles the visibility of the effect. When effect.visible is true, the effect is active and visible on the screen; otherwise it’s hidden. You need to set effect.visible to true in order to show the effect.
If you press Meta + H or make a pinch gesture or move the pointer to the top screen edge, you’re going to see something like this
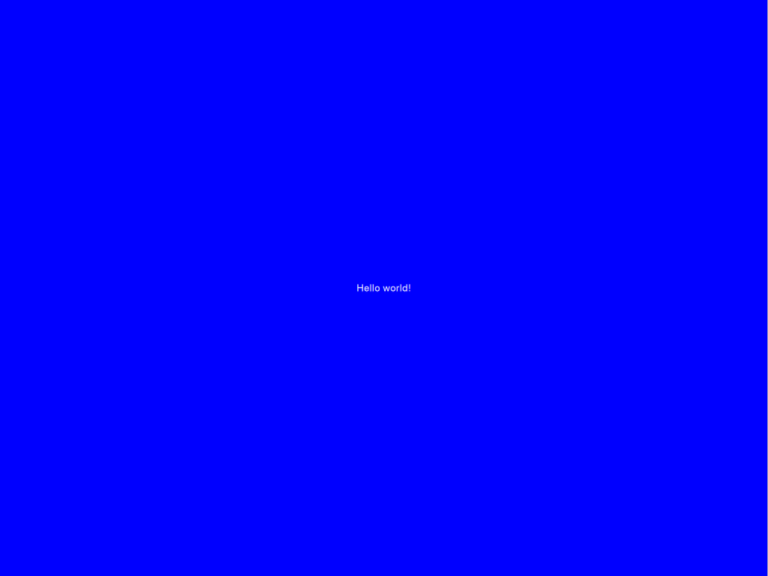
Note that there are no windows visible anymore, it is the responsibility of the effect to decide what should be displayed on the screen now.
Displaying Windows
Being able to display text is great, but it’s not useful. Usually, effects need to display some windows, so let’s display the active window
    delegate: Rectangle {
        color: "blue"

        WindowThumbnail {
            anchors.centerIn: parent
            client: Workspace.activeWindow
        }
    }
The change is quite simple. Instead of displaying a Text component, there’s a
WindowThumbnail component now. The WindowThumbnail type is provided by the
org.kde.kwin module. WindowThumbnail.client indicates what window the thumbnail
item should display.
Input
Input processing contains no kwin specific APIs. TapHandler, MouseArea, Keys
and other stuff available in QtQuick should just work. For example, let’s
implement an effect that arranges windows in a grid and if somebody middle
clicks a window, it will be closed.
    delegate: Rectangle {
        color: "pink"

        GridView {
            id: grid
            anchors.fill: parent
            cellWidth: 300
            cellHeight: 300

            model: WindowModel {}
            delegate: WindowThumbnail {
                client: model.window
                width: grid.cellWidth
                height: grid.cellHeight

                TapHandler {
                    acceptedButtons: Qt.MiddleButton
                    onTapped: client.closeWindow()
                }
            }
        }
    }
The code looks pretty straightforward except maybe the model of the GridView.
WindowModel is a helper provided by org.kde.kwin module that lists all the
windows. It can be passed to various views, Repeater, and so on.
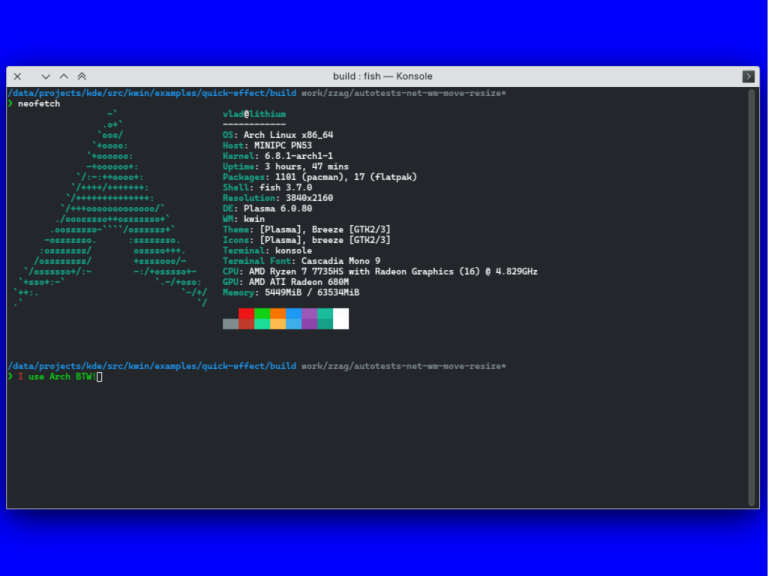
The result can be seen here:
Delegates are Per Screen
One thing to keep in mind is that the delegates are instantiated per screen. For example,
    delegate: Rectangle {
        color: "yellow"

        Text {
            anchors.centerIn: parent
            color: "black"
            text: SceneView.screen.name
        }
    }
When you activate the effect on a setup with several outputs, each output will be filled with yellow color and the output name in the center
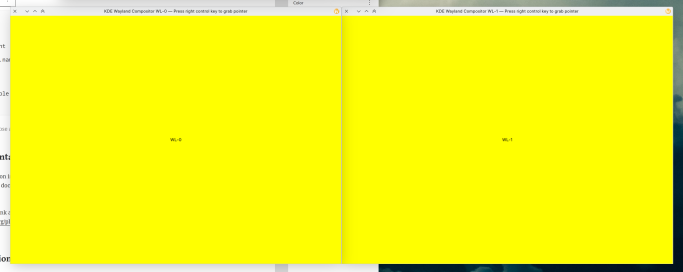
Usually, the output is irrelevant, but if you need to know what output
particular delegate is displayed on, you could use the SceneView.screen
attached property.
Configuration
As your effect grows, you will probably face the need to provide an option or
two. Let’s say that we want the background color in our hello world effect to
be configurable. How do we achieve that? The first step, is to add a main.xml
file in package/contents/config directory, i.e.
package/
├── contents
│   ├── config
│   │   └── main.xml
│   └── ui
│       └── main.qml
└── metadata.json
The main.xml file lists all options
<?xml version="1.0" encoding="UTF-8"?>
<kcfg xmlns="http://www.kde.org/standards/kcfg/1.0"
      xmlns:xsi="http://www.w3.org/2001/XMLSchema-instance"
      xsi:schemaLocation="http://www.kde.org/standards/kcfg/1.0
                          http://www.kde.org/standards/kcfg/1.0/kcfg.xsd" >
    <kcfgfile name=""/>
    <group name="">
        <entry name="BackgroundColor" type="Color">
            <default>#ff00ff</default>
        </entry>
    </group>
</kcfg>
In our case, only one option is needed: BackgroundColor, which has Color type
and #ff00ff default value. You can refer to the KConfigXT documentation to
learn more what other entry types are supported.
The next step is to actually use the BackgroundColor option.
    delegate: Rectangle {
        color: effect.configuration.BackgroundColor

        Text {
            anchors.centerIn: parent
            color: "white"
            text: "Hello world!"
        }
    }
effect.configuration is a map object that contains all the options listed in the main.xml.
Now, if you toggle the hello world effect, you’re going to see:
There are a few more thing left to do though. If you navigate to Desktop Effects settings, you’re not going a configure button next to the hello world effect.

Besides providing a main.xml file, the effect also needs to provide a
config.ui file containing a configuration ui.
package/
├── contents
│   ├── config
│   │   └── main.xml
│   └── ui
│       ├── config.ui
│       └── main.qml
└── metadata.json
The config.ui file is a regular Qt Designer UI file. The only special thing
about it is that the controls that represent options should have special name
format: kcfg_ + OptionName. For example, kcfg_BackgroundColor:
<?xml version="1.0" encoding="UTF-8"?>
<ui version="4.0">
 <class>QuickEffectConfig</class>
 <widget class="QWidget" name="QuickEffectConfig">
  <property name="geometry">
   <rect>
    <x>0</x>
    <y>0</y>
    <width>455</width>
    <height>177</height>
   </rect>
  </property>
  <layout class="QFormLayout" name="formLayout">
   <item row="0" column="0">
    <widget class="QLabel" name="label">
     <property name="text">
      <string>Background color:</string>
     </property>
    </widget>
   </item>
   <item row="0" column="1">
    <widget class="KColorButton" name="kcfg_BackgroundColor">
     <property name="flat">
      <bool>false</bool>
     </property>
    </widget>
   </item>
  </layout>
 </widget>
 <customwidgets>
  <customwidget>
   <class>KColorButton</class>
   <extends>QPushButton</extends>
   <header>kcolorbutton.h</header>
  </customwidget>
 </customwidgets>
 <resources/>
 <connections/>
</ui>
The last final piece in order to expose the configuration ui is to add the following line in the metadata.json file
"X-KDE-ConfigModule": "kcm_kwin4_genericscripted"With all of that, the effect is finally displayed as configurable in the system settings and the background color can be changed
Sharing Your Effect With Other People
The preferred method to distribute third party extensions is via the KDE Store. Both JS and QML effects can be uploaded to the same “KWin Effects” category.
Documentation and Other Useful Resources
Besides the link above, it’s worth having a look at the examples in kwin git repository.
Window Heap
If you need to pack or arrange windows like how the overview effect does, you could use the WindowHeap component from org.kde.kwin.private.effects module. BUT you need to keep in mind that that helper is private and has no stable API yet, so use it on your own risk (or copy paste the relevant code in kwin). Eventually, the WindowHeap will be stabilized once we are confident about its API.
The WindowHeap source code can be found in the KWin repository.
More Examples
If you need more examples, I suggest to have a look at the desktop cube effect in kdeplasma-addons. It’s implemented using the same QML effect API in kwin + QtQuick3D. The source code can be found in kdeplasma-addons repositoriy.