Using actions
Introduction
This tutorial introduces the concept of actions. Actions are a unified way of supplying the user with ways to interact with your program.
For example, if we wanted to let the user of our main window tutorial clear the text box by clicking a button in the toolbar, from an option in the File menu or through a keyboard shortcut, it could all be done with one QAction.

QActions
A QAction is an object which contains all the information about the icon and shortcuts that are associated with a certain action. With the use of signals and slots, whenever that action is triggered (like clicking a menu option), a function in a different part of your program is automatically run.
QActions are most commonly used in QMenus shown in a QMenuBar, a QToolBar, or in a right click context menu.
The Code
main.cpp
We are going to install our UI .rc file under the component texteditor, so main.cpp should be changed to reflect that change in name.
Don't worry about the .rc file just yet. We will see what it's about by the end of this tutorial.
    // ...
    KLocalizedString::setApplicationDomain("texteditor");

    KAboutData aboutData(
            u"texteditor"_s,
    // ...
mainwindow.h
| |
Only a function void setupActions() has been added which will do all the work setting up the QActions.
mainwindow.cpp
| |
Explanation
This builds upon the KXmlGuiWindow code from our previous main window. Most of the changes are to mainwindow.cpp, an important structural change being that the constructor for MainWindow now calls setupActions() instead of setupGUI(). setupActions() is where the new QAction code goes before finally calling setupGUI() itself.
Creating the QAction object
The QAction is built up in a number of steps. The first is including the QAction header and then creating one:
#include <QAction>
...
QAction *clearAction = new QAction(this);
This creates a new QAction called clearAction.
Setting QAction Properties
Now that we have our QAction object, we can start setting its properties. With QAction::setText(), we can set the text that will be displayed in the menu and with an optional QAction::icon() in the toolbar, depending on the widget style (whether beside or below the icon) or setting (whether to display the action text or not).
clearAction->setText(i18n("&Clear"));Note that the text is passed through the i18n() function; this is necessary for the UI to be translatable, as mentioned in Hello World (more information on this can be found in the internationalisation docs).
The ampersand (&) in the action text denotes which letter will be used as an accelerator for said action. If the user opens a menu and presses the 'Alt' key, this will highlight the first letter of 'Clear' with an underscore, denoting the key they can press to perform said action. In this case, the user would press 'Alt+C' to clear the textbox when the File menu is open.
The ampersand is also useful for internationalisation: in non-Latin languages such as Japanese (where 'copy' is コピー), using the first letter of that language to accelerate the action could be cumbersome. The ampersand lets translators know whether they should include the Latin character in parentheses, allowing non-English users to use the same accelerator key even if the translated string is completely different.
Icon
If the action is going to be displayed in a toolbar, it is nice to have an icon depicting the action. The icon may also be displayed beside the action in the menus, depending on the widget style. We use a QIcon::fromTheme() to grab the system's default icon for "document-new-symbolic" and use QAction::setIcon() to assign it to our clearAction.
clearAction->setIcon(QIcon::fromTheme(u"document-new-symbolic"_s));Adding to the Collection
In order for the action to be accessed via KXmlGui (explained in depth later) it must be added to the application's action collection.
Because our KXmlGuiWindow uses the KXmlGuiClient interface, we can use the utility virtual function KXmlGuiClient::actionCollection() to retrieve the list of actions in our application, returning a KActionCollection.
Because of the actionCollection()'s return type, we can use convenience functions made available via KActionCollection, like KActionCollection::addAction().
The action collection is accessed via the actionCollection() function like this:
actionCollection()->addAction(u"clear"_s, clearAction);Here, our clearAction QAction is added to the collection and given a name of clear. This name (clear) is used by the KXmlGui framework to refer to the action, so it is used internally and will not be localized.
Keyboard Shortcuts
We can then use one of the utility functions of our action collection, KActionCollection::setDefaultShortcut(), to attribute a default keyboard shortcut of Ctrl+L:
actionCollection()->setDefaultShortcut(clearAction, Qt::CTRL + Qt::Key_L);The list of available keys can be found in the Qt namespace Key enum.
Connecting the action
Now that the action is fully set up, it needs to be connected to something useful. In this case (because we want to clear the text area), we connect our action to the KTextEdit::clear() slot belonging to a KTextEdit (which, unsurprisingly, clears the text):
connect(clearAction, &QAction::triggered, textArea, &KTextEdit::clear);Here we are using a QObject::connect(), Qt's most useful magic. The first parameter is the object we created and which sends the signal, our clearAction; the second is a reference to the signal itself, namely triggered(); the third is the object whose slot will receive the signal, our textArea; and the last one is a reference to the slot to receive the signal, namely clear(). In other words, this can be read as "connect this object's signal to that object's slot", or "when this signal fires, run that slot".
Refer to Qt's documentation on Signals and Slots to understand this better. Signals and slots are essential to make Qt apps, understanding them is highly recommended.
KStandardAction
For actions which would likely appear in almost every KDE application such as 'quit', 'save', and 'load' there are pre-created convenience QActions, accessed through KStandardAction.
They are very simple to use. Once the library has been included (#include <KStandardAction>), simply supply it with what you want the function to do and which QActionCollection to add it to. For example:
KStandardAction::quit(qApp, &QCoreApplication::quit, actionCollection());Here we call the QApplication::quit() method whenever KStandardAction::quit() is triggered. We are able to access that method via the QApplication::qApp macro, which returns a pointer to the specific QApplication object used in our application, the one in main().
In the end, this creates an action with the correct icon, text and shortcut and even adds it to the File menu.
Adding the action to menus and toolbars
At the moment, the new "Clear" action has been created but it hasn't been associated with any menus or toolbars. We will be using KXmlGui's capabilities for that, as it does nice things like create movable toolbars for you.
Defining your own help menu
The Help menu has been standardized to ease the lives of both developers and users, which is why all KDE software Help menus look the same. If you want to create your own help menu, you should refer to the explanation provided in the Using your own "about application" dialog box section of KHelpMenu.
XMLGUI
The setupGUI() function in KXmlGuiWindow depends on the KXmlGui system to construct the GUI, which is done by parsing an XML file description of the interface.
The rule for naming this XML file is appnameui.rc, where appname is the name you set in KAboutData (in this case, TextEditor). So in our example, the file is called texteditorui.rc, and is placed in the same folder as our other files. Where the file will ultimately be placed is handled by CMake.
appnameui.rc file
Since the description of the UI is defined with XML, the layout must follow strict rules. This tutorial will not go into great depth on this topic.
texteditorui.rc
| |
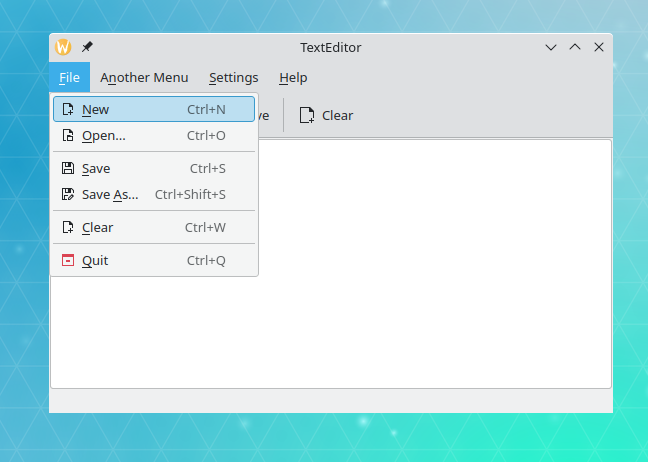
The <Toolbar> tag allows you to describe the toolbar, which is the bar across the top of the window normally with icons. Here it is given the unique name mainToolBar and its user visible name set to "Main Toolbar" using the <text> tag. The clear action is added to the toolbar using the <Action> tag, the name parameter in this tag being the string that was passed to the action collection with KActionCollection::addAction() in mainwindow.cpp.
Besides having the action in the toolbar, it can also be added to the menubar. Here the action is being added to the File menu of the MenuBar the same way it was added to the toolbar.
Change the 'version' attribute of the <gui> tag if you changed the .rc file since the last install to force a system cache update. Be sure it is an integer, if you use a decimal value, it will not work, and you will get no warning about it.
Warning
The version attribute must always be an integer number.Some notes on the interaction between code and the .rc file: menus appear automatically and should have a <text/> child tag unless they refer to standard menus. Actions need to be created manually and inserted into the actionCollection() using the same name as in the .rc file. Actions can be hidden or disabled, whereas menus can't.
CMake
Finally, the texteditorui.rc needs to go somewhere where the system can find it (you can't just leave it in the source directory!). This means the project needs to be installed somewhere, unlike in the previous tutorials.
CMakeLists.txt
| |
This file is almost identical to the one for the previous tutorial, but with two extra lines at the end that describe where the files are to be installed. Firstly, the texteditor target is installed to the right place for binaries using ${KDE_INSTALL_TARGETS_DEFAULT_ARGS}, then the texteditorui.rc file that describes the layout of the user interface is installed to the application's data directory, ${KDE_INSTALL_KXMLGUIDIR}.
Running our application
You can repeat the same steps provided in KXmlGui Hello World to build and install the application. You can then run the project with:
kde-builder --run texteditoror
texteditorAs you might remember from the KXmlGui Hello World, when installing the project manually with CMake, we specified the --install-prefix flag:
cmake -B build/ --install-prefix ~/.local
cmake --build build/ --parallel
cmake --install build/
This will create a /usr-like directory structure in ~/.local. Specifically, it will create the directories ~/.local/bin/ and ~/.local/share/, then install the executable to ~/.local/bin/texteditor and the texteditorui.rc file to ~/.local/share/kxmlgui/texteditor/texteditorui.rc.