Connect C++ models to your QML user interface
As shown from the previous tutorial, you can connect C++ code to QML by creating a class that will be treated as just another component in QML. However, you may want to represent more complicated data, such as data that needs to act as a custom ListModel or in some way needs to be delegated from a Repeater.
We can create our own models from the C++ side, and declare how the data from that model should be represented on the QML frontend.
Preparing the Class
In this tutorial, we will create a class that contains a QMap, where a QString is used as a key and QStringList objects are used as values. The frontend will be able to read and display the keys and values and be simple to use just like a one-dimensional array. It should look similar to a QML ListModel.
To do this, we need to declare a class that inherits from
QAbstractListModel. Let's also add in
some add data to the QMap. These declarations will be located in
model.h.
Note
If you are following along, please remember to update yourCMakeLists.txt file!#pragma once
#include <QAbstractListModel>
class Model : public QAbstractListModel {
private:
QMap<QString, QStringList> m_list = {
{"Feline", {"Tigress", "Waai Fuu"}},
{"Fox", {"Carmelita", "Diane", "Krystal"}},
{"Goat", {"Sybil", "Toriel"}}
};
};Of course, we can't just display this class as is. We also need to tell QML on how to represent this data in the class. We can do this by overriding three virtual functions that are essential at doing this, all of which do their own tasks.
rowCount()- Think of this function as a way to tell QML how many items are in the model to represent.roleNames()- You can think of role names as property names attached to data in QML. This function allows you to create those roles.data()- This function is called when you want to retrieve the data that corresponds to the role names from the model.
Note
The custom role names created byroleNames() are only usable when a model is
being delegated, and are not usable outside of it. See Models and
Views.Note
Technically, models in Qt are represented as tables, with rows and columns. So, what overridingrowCount() does is tell Qt how many rows are in a model.
Since we are just dealing with a one-dimensional array in this tutorial, you
can just think of "rows" as "number of elements."Overriding and Implementing rowCount()
Let's override the function in the header file. The rowCount() comes with its
own parameter, but will not be used in this example and is excluded.
class Model : public QAbstractListModel {
...
public:
    int rowCount(const QModelIndex &) const override;
};
Then, let's declare how many rows are in this model in model.cpp.
#include "model.h"

int Model::rowCount(const QModelIndex &) const {
    return m_list.count();
}
Overriding and Implementing roleNames()
Before we override roleNames(), we need to declare what the roles are in the
C++ side using an public enum variable. The reason for this is because these
values from the enum variable are passed into data() every time QML
accesses a corresponding role, and as such we can make data() return what we
want.
Let's begin with creating the enum variable for roles, where each value is a
role for the C++ side.
class Model : public QAbstractListModel {
...
public:
    enum Roles {
        SpeciesRole = Qt::UserRole,
        CharactersRole
    };

    ...
    QHash<int, QByteArray> roleNames() const override;
};
Once we have that settled, we can finally create what these roles are in the QML side using a QHash where the keys are the enumerated values paired with QByteArrays. The text in the QByteArray is what's used in the actual QML code.
QHash<int, QByteArray> Model::roleNames() const {
    return {
        {SpeciesRole,   "species"},
        {CharactersRole, "characters"}
    };
}
In our example model, the role "species" can be used to retrieve the QString key "Feline", "Fox", "Goat", each in a separate delegate. The same can be done with the QStringList values for the character names list.
Overriding and Implementing data()
There are two parameters that are passed in data(): index and role.
index is the location of where the data is when being delegated. As
previously stated, role is used by QML to get specific data returned when
it's accessing a role.
In data(), we can use a switch statement to return the appropriate data and
data type depending on the role, which is possible as data() returns a
QVariant. We still need to make sure we get the
appropriate location of the data, though. In this example below, you can see
that a new iterator variable is being declared, which is set from the beginning
of the list plus the row of the index and the data that the iterator is
pointing to is what is being returned.
We can't just return whatever data we want though. We may be trying to bind data to a property with an incompatible data type, such as a QStringList to a QString. You may have to do data conversion in order for the data to be displayed properly.
QVariant Model::data(const QModelIndex &index, int role) const {
    const auto it = m_list.begin() + index.row();
    switch (role) {
        case SpeciesRole:
            return it.key();
        case CharactersRole:
            return formatList(it.value());
        default:
            return {};
    }
}

QString Model::formatList(const QStringList& list) {
    QString result;
    for (const QString& character : list) {
        result += character;
        if (list.last() != character) {
            result += ", ";
        }
    }
    return result;
}
Allow the Class to be Declared in QML
Let's not forget to make our class usable in QML.
int main(int argc, char *argv[]) {
    ...
    qmlRegisterType<Model>("CustomModel", 1, 0, "CustomModel");
    ...
}
Class Usage in QML
The QML file that is used will just contain three
Kirigami.AbstractCard components, where the key is the
header and the value is the content. These cards are created by delegating an
AbstractCard using a Repeater, where the custom model we created acts as the
model. The data is accessed using word model, followed by the roles we
declared in roleNames().
import QtQuick
import QtQuick.Layouts
import QtQuick.Controls as Controls
import org.kde.kirigami as Kirigami
import CustomModel 1.0

Kirigami.ApplicationWindow {
    id: root
    title: "Tutorial"

    CustomModel {
        id: customModel
    }

    pageStack.initialPage: Kirigami.ScrollablePage {
        ColumnLayout {
            Repeater {
                model: customModel
                delegate: Kirigami.AbstractCard {
                    header: Kirigami.Heading {
                        text: model.species
                        level: 2
                    }
                    contentItem: Controls.Label {
                        text: model.characters
                    }
                }
            }
        }
    }
}
Data Modification
Editing Data Using dataChanged() and setData()
You may encounter a situation where you want to modify data in the model, and
have the changes reflected on the frontend side. Every time we change data in
the model, we must emit the dataChanged() signal which will apply those changes on
the frontend side at the specific cells specified in its arguments. In this
tutorial, we can just use the index argument of setData().
setData() is a virtual function you can override so that attempting
to modify the data from the frontend side automatically reflects those
changes on the backend side. It requires three parameters:
index- The location of the data.value- The contents of the new data.role- In this context, the role here is used to tell views how they should handle data. The role here should beQt::EditRole.
The role parameter in this case is used to ensure setData() can be
edited via user input (Qt::EditRole). Using index, we
can use that to determine the location of where the data should be edited with
the contents of value.
bool Model::setData(const QModelIndex &index, const QVariant &value, int role) {
    if (!value.canConvert<QString>() && role != Qt::EditRole) {
        return false;
    }

    auto it = m_list.begin() + index.row();
    QString charactersUnformatted = value.toString();
    QStringList characters = charactersUnformatted.split(", ");

    m_list[it.key()] = characters;
    emit dataChanged(index, index);

    return true;
}
Note
setData() does not automatically emit dataChanged() and that still has to
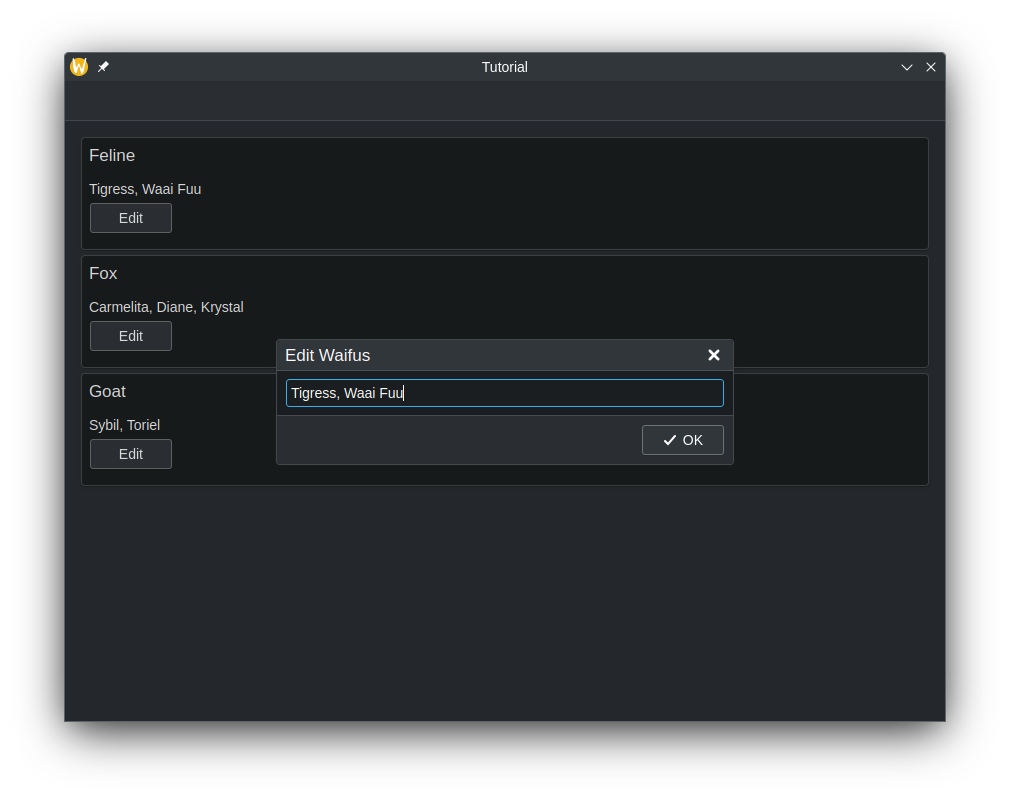
be done manually.Let's update the QML code so that we can open up a prompt that allows us to edit the model using a Controls.Button attached to the cards.
Kirigami.ApplicationWindow {
    ...

    Kirigami.OverlaySheet {
        id: editPrompt

        property var model
        property alias text: editPromptText.text

        title: "Edit Characters"

        Controls.TextField {
            id: editPromptText
        }

        footer: Controls.DialogButtonBox {
            standardButtons: Controls.DialogButtonBox.Ok
            onAccepted: {
                const model = editPrompt.model;
                model.characters = editPromptText.text;
                editPrompt.close();
            }
        }
    }

    pageStack.initialPage: Kirigami.ScrollablePage {
        ColumnLayout {
            Repeater {
                model: customModel
                delegate: Kirigami.AbstractCard {
                    Layout.fillHeight: true
                    header: Kirigami.Heading {
                        text: model.species
                        level: 2
                    }
                    contentItem: Item {
                        implicitWidth: delegateLayout.implicitWidth
                        implicitHeight: delegateLayout.implicitHeight
                        ColumnLayout {
                            id: delegateLayout
                            Controls.Label {
                                text: model.characters
                            }
                            Controls.Button {
                                text: "Edit"
                                onClicked: {
                                    editPrompt.text = model.characters;
                                    editPrompt.model = model;
                                    editPrompt.open();
                                }
                            }
                        }
                    }
                }
            }
        }
    }
}
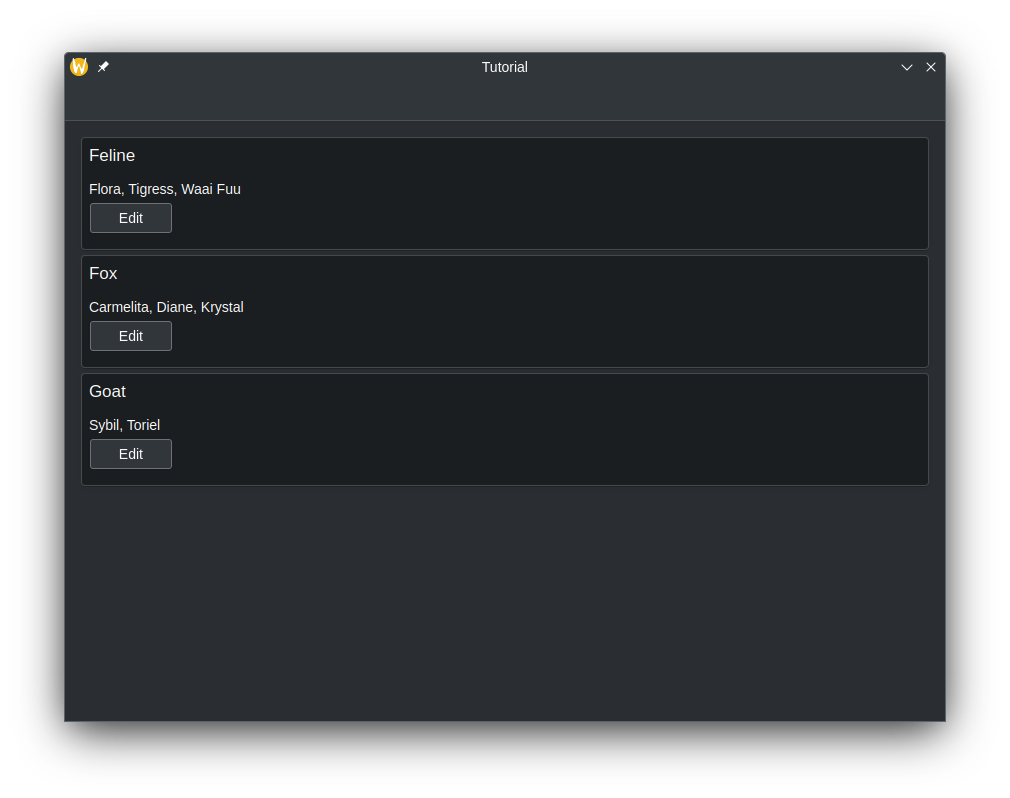
Now, whenever the values of the model change in the frontend, the changes should automatically update on the backend.
Adding Rows
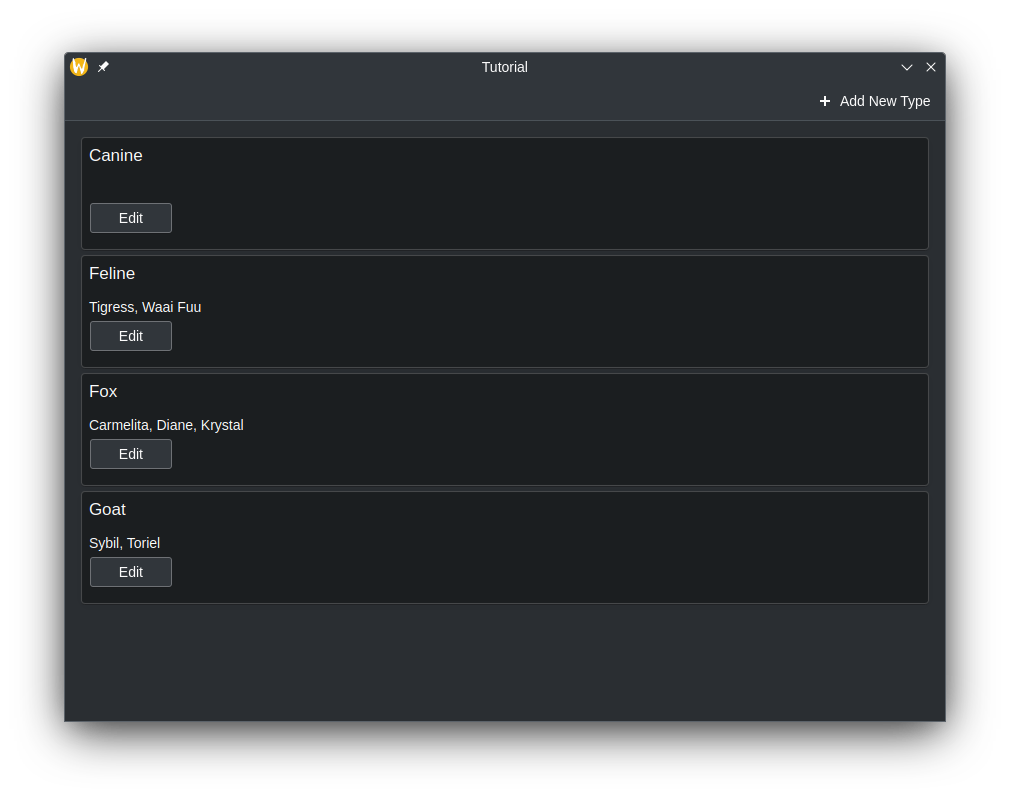
We added a way to modify the data in existing keys of the QMap, and in the front end, this is reflected as modifying the contents inside the AbstractCards. But what if we need to add a new key entry in the QMap and have that reflected on the QML side? Let's do this by creating a new method that is callable on the QML side to perform this task.
To make the method visible in QML, we must use the Q_OBJECT macro in the class, and begin the method declaration with the Q_INVOKABLE macro. This method will also include a string parameter, which is intended to be the new key in the QMap.
class Model : public QAbstractListModel {
Q_OBJECT;

    ...
public:
    ...
    Q_INVOKABLE void addSpecies(const QString &species);
};
Inside of this method, we need to tell Qt that we want to create more rows in
the model. This is done by calling beginInsertRows() to begin our row adding
operation, followed by inserting whatever we need, then use endInsertRows()
to end the operation. We still need to emit dataChanged() at the end,
however. This time, we are going to update all rows, from the first row to the
last one as the QMap may alphabetically reorganize itself, and we need to catch
that across all rows.
When calling beginInsertRows(), we need to first pass in a QModelIndex class
to specify the location of where the new rows should be added, followed by what
the new first and last row numbers are going to be. In this tutorial, the first
argument will just be QModelIndex() as there is no need to use the parameter
here. We can just use the current row size for the first and last row number,
as we'll just be adding one row at the end of the model.
void Model::addSpecies(const QString& species) {
    beginInsertRows(QModelIndex(), m_list.size() - 1, m_list.size() - 1);
    m_list.insert(species, {});
    endInsertRows();
    emit dataChanged(index(0), index(m_list.size() - 1));
}
Note
ThedataChanged() function uses QModelIndex as the data type for its
parameters. However, we can convert integers in QModelIndex data types using
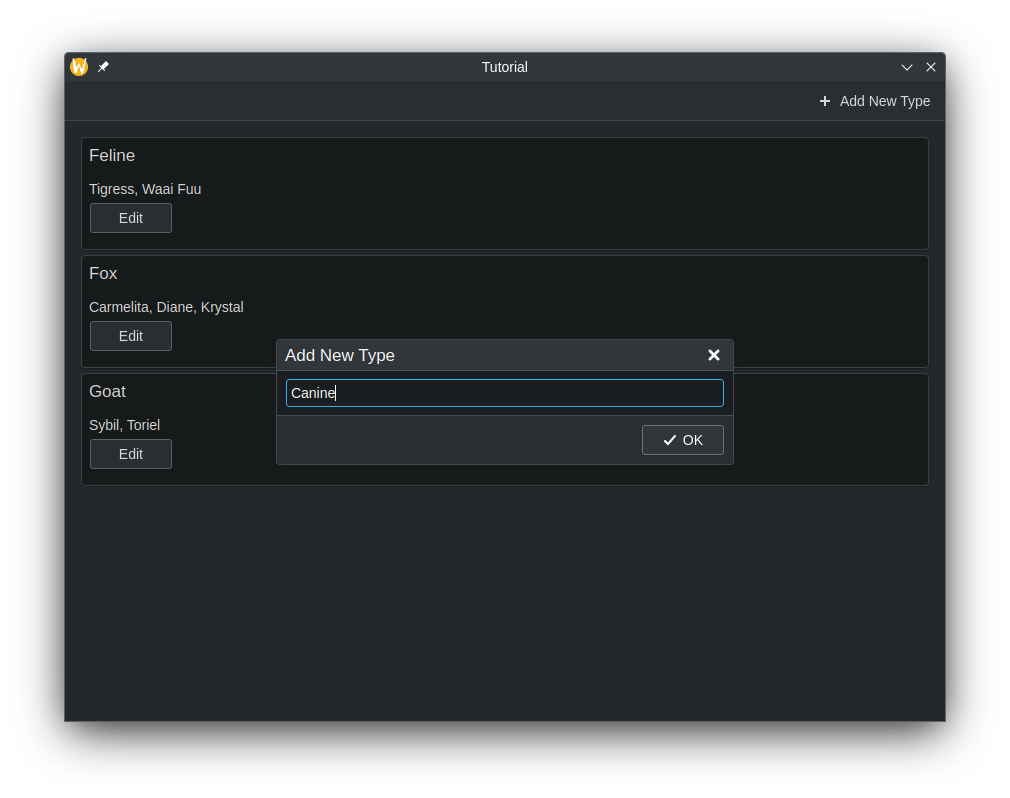
the index() function.Let's update the QML code so we are given the ability to add a new key to the QMap.
Kirigami.ApplicationWindow {
    ...

    Kirigami.OverlaySheet {
        id: addPrompt

        title: "Add New Species"

        Controls.TextField {
            id: addPromptText
        }

        footer: Controls.DialogButtonBox {
            standardButtons: Controls.DialogButtonBox.Ok
            onAccepted: {
                customModel.addSpecies(addPromptText.text);
                addPromptText.text = ""; // Clear TextField every time it's done
                addPrompt.close();
            }
        }
    }

    pageStack.initialPage: Kirigami.ScrollablePage {
        actions: [
            Kirigami.Action {
                icon.name: "add"
                text: "Add New Species"
                onTriggered: {
                    addPrompt.open();
                }
            }
        ]
        ...
    }
}
Now, we should be given a new action at the top of the app that brings up a prompt that allows to add a new element to the model, with our own custom data.
Removing Rows
The way remove rows is similar to adding rows. Let's create another method that we'll call in QML. This time, we will use an additional parameter, and that is an integer that is the row number. The species name is used to delete the key from the QMap, while the row number will be used to delete the row on the front end.
class Model : public QAbstractListModel {
Q_OBJECT;

...
    public:
    ...

    Q_INVOKABLE void deleteSpecies(const QString &speciesName, const int &rowIndex);
}
void Model::deleteSpecies(const QString &speciesName, const int& rowIndex) {
beginRemoveRows(QModelIndex(), rowIndex, rowIndex);
m_list.remove(speciesName);
endRemoveRows();
emit dataChanged(index(0), index(m_list.size() - 1));
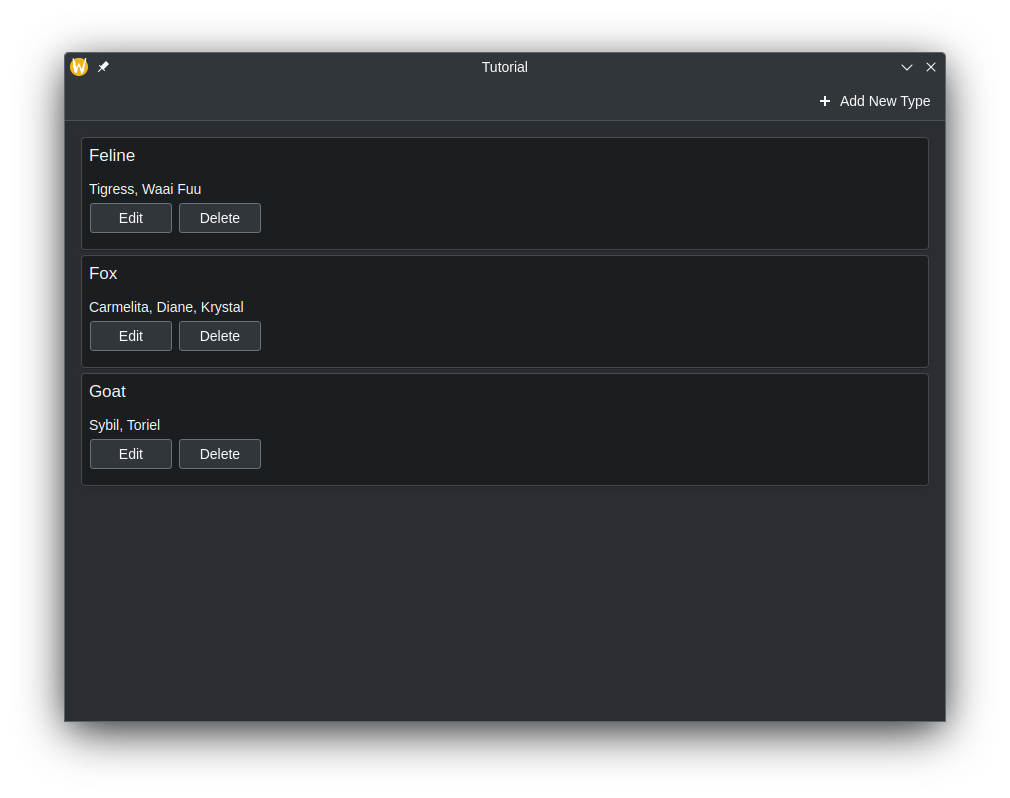
}Now, let's update the application so a "Delete" button appears alongside the edit button, and hook it up to our delete method.
ColumnLayout {
    Repeater {
        model: customModel
        delegate: Kirigami.AbstractCard {
            ...
            contentItem: Item {
                implicitWidth: delegateLayout.implicitWidth
                implicitHeight: delegateLayout.implicitHeight
                ColumnLayout {
                    id: delegateLayout
                    Controls.Label {
                        text: model.characters
                    }
                    RowLayout {
                        Controls.Button {
                            text: "Edit"
                            onClicked: {
                                editPrompt.text = model.characters;
                                editPrompt.model = model;
                                editPrompt.open();
                            }
                        }
                        Controls.Button {
                            text: "Delete"
                            onClicked: {
                                customModel.deleteSpecies(model.species, index);
                            }
                        }
                    }
                }
            }
        }
    }
}
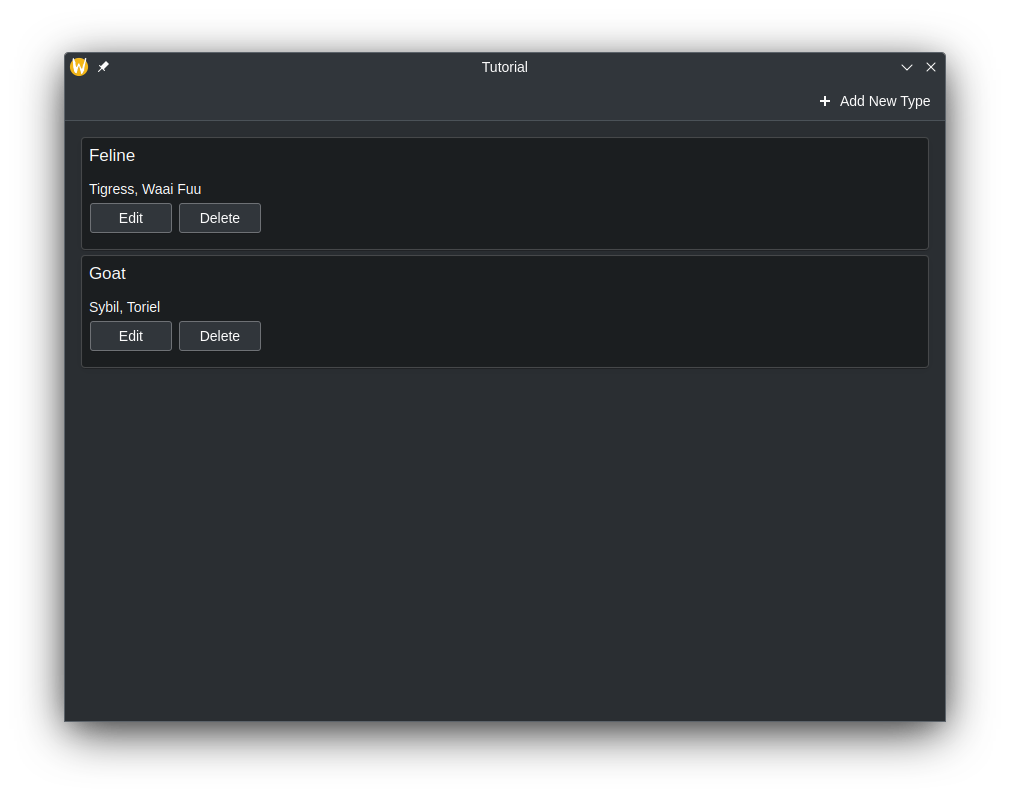
Full Code
Main.qml
| |
model.h
| |
model.cpp
| |
More Information
For more information, see Using C++ Models with Qt Quick Views and Model/View Programming.