Appium automation testing
Introduction
KDE uses manually triggered unit tests as well as autotests to prevent code changes to our applications from introducing usability issues. Oftentimes, this is not enough for graphical applications, so testing the user interface directly is required. To automate this, KDE uses Appium tests.
Appium is an open source tool based on Selenium for automating applications on various mobile and desktop platforms.
Selenium itself is used to automate testing web applications. Appium derives from it to allow for application testing in multiple platforms and in multiple languages.
Appium does this leverage of multiple platforms and languages by using a driver. A driver is a component or interface that acts as a bridge between your test scripts and the application you want to automate. With it, developers can write Selenium-style user interface tests for manipulating the user interface, test accessibility, and measure power consumption.
The Linux Driver: Selenium AT-SPI
Appium has the ability to automate Linux apps by using the Linux accessibility API AT-SPI2. KDE has a driver for this called Selenium AT-SPI, a WebDriver server for Linux apps that runs the application in a localhost webserver so it can work in non-GUI environments (such as CI jobs), while also being able to run locally in a Wayland compositor (KWin) so the tester can run the tests manually and see the results.
The Linux Driver supports testing applications that implement the AT-SPI2 interface. Applications written in Qt5/Qt6 or GTK3/GTK4 have good support for the AT-SPI2 interface.
In Qt's case, all you need to do is to follow standard Qt Accessibility practices.
This tutorial will provide a step-by-step guide to use Selenium AT-SPI to automate system testing of QtQuick applications using Python scripts.
Installation
This tutorial requires Python 3.8+ which is included by default in most distributions.
Installation of Accerciser (an interactive accessibility explorer) and Orca (screen reader) are recommended if you want to test accessibility with Appium tests.
 Kubuntu Kubuntu KDE Neon KDE Neon | sudo apt install accerciser orca |
 Manjaro Manjaro Arch Arch | sudo pacman -S accerciser orca |
 OpenSUSE OpenSUSE | sudo zypper install accerciser orca |
 Fedora Fedora | sudo dnf install accerciser orca |
Building from source
kde-builder is the recommended tool to build selenium-webdriver-at-spi from source. Learn how to set up a KDE development environment using kde-builder.
After the development environment is set up, run the command below to build both selenium-webdriver-at-spi and kcalc from source. The command will automatically install all the required dependencies:
kde-builder kcalc selenium-webdriver-at-spiRun the example test script to check that your installation is working.
With kde-builder:
kde-builder --run selenium-webdriver-at-spi-run ~/kde/src/selenium-webdriver-at-spi/examples/calculatortest.pyYou will see a black window titled "KDE Wayland Compositor" running a KCalc window and having a few buttons getting highlighted (very fast!) as they're activated.
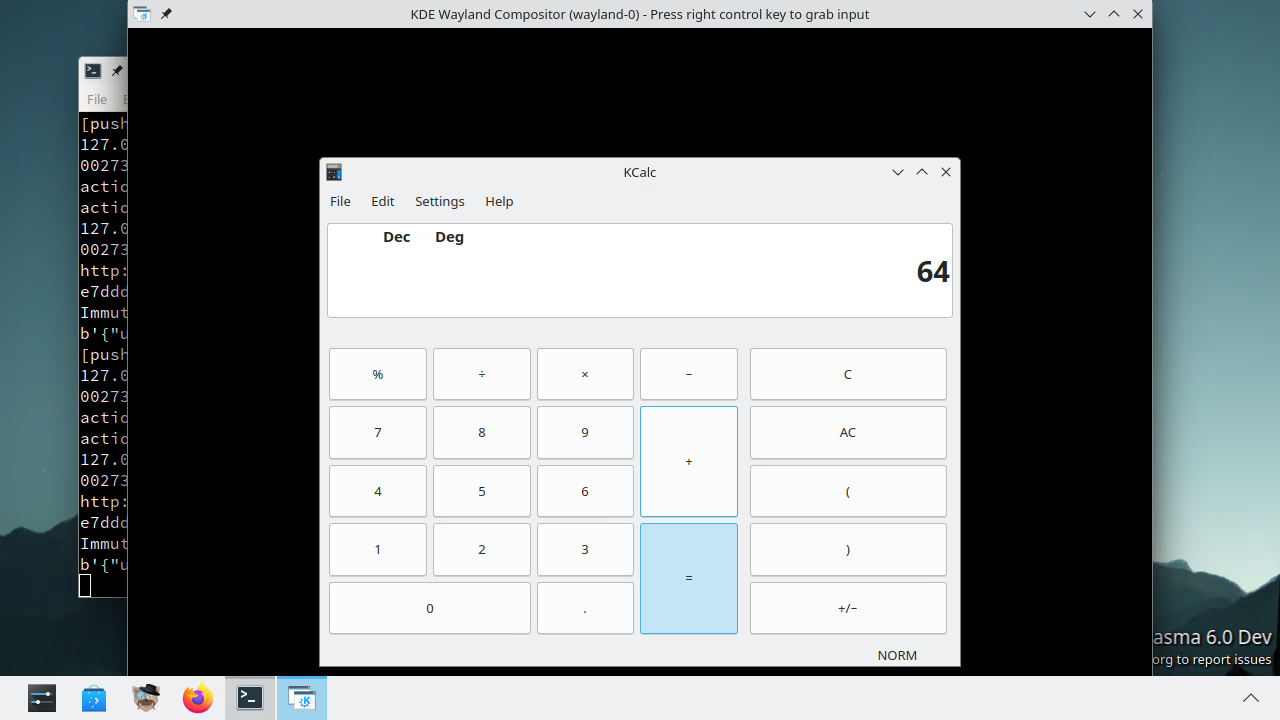
KCalc running in nested KWin
After the test is complete, the window will close itself automatically, and you can see the test result in the console output.
----------------------------------------------------------------------
Ran 6 tests in 38.326s

OK
I, [2023-10-17T20:37:55.194322 #32112]  INFO -- : tests done
I, [2023-10-17T20:37:55.217687 #32112]  INFO -- : run.rb exiting true
Building manually
To build Selenium manually, you will need to install its dependencies first:
| KubuntuKDE Neon | sudo apt install extra-cmake-modules libkf6windowsystem-dev libwayland-dev libkpipewire-dev kwin-dev libwayland-dev kwayland-dev plasma-wayland-protocols |
| ManjaroArch | sudo pacman -S extra-cmake-modules kwindowsystem kwayland kpipewire kwin wayland |
| OpenSUSE | sudo zypper install extra-cmake-modules kwindowsystem-devel kwayland-devel kpipewire-devel kwin6-devel wayland-devel |
| Fedora | sudo dnf install extra-cmake-modules kf6-kwindowsystem-devel kwayland-devel kpipewire-devel kwin-devel wayland-devel |
Then clone the repository and build it:
git clone https://invent.kde.org/sdk/selenium-webdriver-at-spi.git
cd selenium-webdriver-at-spi
cmake -B build/
cmake --build build/
sudo cmake --install build/
This will install it in your host root.
Running Tests
Since this tutorial will focus on test scripts, at first we will be using QML code snippets instead of a full project to exemplify their use. First, we should see how an Appium test looks like.
Anatomy of an Appium test
Writing an Appium test consists of three things:
- a class that is initialized with Appium options
- class members that start with the name "test_"
- an entrypoint
At minimum, an Appium test should contain the following:
import unittest
from appium import webdriver
from appium.webdriver.common.appiumby import AppiumBy
from appium.options.common.base import AppiumOptions
from selenium.webdriver.support.ui import WebDriverWait

class YourTestClass(unittest.TestCase):
    @classmethod
    def setUpClass(self) -> None:
        options = AppiumOptions()
        options.set_capability("app", "/path/to/program")
        self.driver = webdriver.Remote(command_executor='http://127.0.0.1:4723', options=options)
        self.driver.implicitly_wait = 10

    @classmethod
    def tearDownClass(self) -> None:
        self.driver.quit()

    @classmethod
    def test_something(self) -> None:
        # Do something here

if __name__ == '__main__':
    unittest.main()
The class can have any name you'd like, conventionally using uppercase, and it must derive from Python's standard unittest library.
The first class method is like a constructor where we perform some setup and can
have any name, but it is conventionally called "setUpClass()". AppiumOptions()
provides the default settings for our tests. set_capability() takes a
Python dictionary,
analogous to C++ std::map
or Qt's QMap.
In this case, the first string is the key, the second string is the value. The list of keys and values available can be seen in the Appium Documentation for Capabilities. As can be seen in the documentation, the string "app" used above corresponds to the capability "appium:app".
The "app" capability points to the application that will be tested, and it can be:
- The absolute path to an executable and optionally its command line parameters.
- The relative path to an executable and optionally its command line parameters (used for autotests when the application is being built).
- The desktop file that runs the application, without the file path and including the
.desktopextension.
Next we use some boilerplate code that allows Appium to run at a localhost web server at a certain port, passing the options and capabilities we have defined. Then, we set a timeout of 10 seconds to allow the test to prepare and run the application when it is executed.
The second class method functions like a destructor that makes sure the driver will quit once the tests are done. It also lets you terminate any other external processes you might have started for your tests, like a small web server.
As mentioned before, we need a class method that starts with the name "test_" and that will perform the actual test.
Lastly we create the main entrypoint for our test.
GUI interaction via Appium tests
For QML applications, interaction with Appium tests is simple and consists of two steps:
- Defining a property to a QML element that makes it locatable.
- Using a Selenium Locator to find that QML element.
The Qt API that is required to make a QML element locatable is Accessible. Typically what is used is Accessible.name or Accessible.description.
To find that QML element, we'd use the aptly named Appium function find_element(), to which we pass a Selenium Locator.
Essential Locators
The locator that is most commonly used for tests in KDE software is
NAME.
It matches the Accessible.name set in the QML code.
For example, if we have a QtQuick.Controls.Button:
Controls.Button {
    text: "Hello World!"
    Accessible.name: "Button"
}
A test that clicks said button can be defined like the following:
def test_click_button(self) -> None:
    self.driver.find_element(by=AppiumBy.NAME, value="Button").click()
    # Or the less direct but more legible:
    # button = self.driver.find_element(by=AppiumBy.NAME, value="Button")
    # button.click()
A string can be directly passed to find_element() as well.
This is useful to access the Accessible.description of an element:
Controls.Button {
    text: "Hello World!"
    Accessible.description: "A clickable button"
}
In a test, we'd use:
def test_click_button(self) -> None:
    self.driver.find_element(by="description", value="A clickable button").click()
Another particularly useful Appium function we can use is send_keys(), which allows to send keyboard input to the application. With a simple QtQuick.Controls.TextField for example:
Controls.TextField {
    placeholderText: "Hello World!"
    Accessible.name: "Text field"
}
You would simply do:
def test_input(self) -> None:
    text_input = self.driver.find_element(by=AppiumBy.NAME, value="Text field")
    text_input.send_keys("Hello Appium")
If you need to enter certain non-typable keys, such as Enter/Return, you can use Selenium Keys for that:
from selenium.webdriver.common.keys import Keys

# ...

def test_dialog_confirm(self) -> None:
    edit_field = self.driver.find_element(by=AppiumBy.NAME, value="Text field")
    edit_field.send_keys("myquery")
    edit_field.send_keys(Keys.ENTER)
Another commonly used function is
get_attribute().
It can be used to determine whether an element currently has an Accessible
attribute such as
focused or
selected
enabled.
searchFocused = searchField.get_attribute('focused')There are many other convenience functions:
- get_clipboard_text()
- double_click()
- touchscreen tap()
- mouse move_to()
- get_screenshot_as_file()
These can be seen at the Appium Commands documentation.
Additional commands specific to using Python scripts can be seen at the Selenium Python documentation.
Other ways to use locators
In the introductory section The Linux Driver: Selenium AT-SPI, you became aware that Linux has a standard driver for handling accessibility. This driver is used, for example, in the Qt and GTK toolkits, and it specifies things such as accessibility IDs or Roles.
For the accessibility ID, which serves as a unique identifier for a user interface element, we can use the Appium-provided locator ACCESSIBILITY_ID, which should match the QML objectName.
Item {
    objectName: "Button"
}
The locator would be used like so:
def test_click_button(self) -> None:
    self.driver.find_element(by=AppiumBy.ACCESSIBILITY_ID, value="Button").click()
The accessibility ID can be used in a generic manner like NAME or "description" as shown above, but its primary use is with QtWidgets applications. You can see a live example of this in KDebugSettings.
While the accessibility ID is a unique identifier, the Role on the other hand is a generic identifier for an element type, especially used for keyboard navigation. It is used to determine how to traverse focus, for example, in a menu bar, a tool bar, a check box, and other elements. In code terms, this means a QtQuick.Controls.Button and a Kirigami.Action attached to a button would share the same role of "push button", as they are both functionally buttons.
You can view the available roles in an application by using Accerciser, an application that allows you to explore accessibility properties in other programs. KDE also has its own accessibility explorer, Accessibility Inspector.
To inspect roles in KDE applications, you first need to open Accerciser, and
then run the desired KDE application by passing the environment variable
QT_LINUX_ACCESSIBILITY_ALWAYS_ON, like so:
QT_LINUX_ACCESSIBILITY_ALWAYS_ON=1 plasma-discoverDiscover for example has a test that first waits for the loading screen to vanish before searching for certain user interface elements. To do so, it first searches for the "Loading..." label's Role:
Kirigami.Action {
    text: {
        if (!root.isStateAvailable) {
            return i18nc("State being fetched", "Loading…")
        }
        // Rest of code here
    }
}
Then it uses the Selenium function invisibility_of_element_located() together with the Selenium locator CLASS_NAME to be sure the "Loading..." element is no longer there.
def test_search_install_uninstall(self):
    WebDriverWait(self.driver, 30).until(
        EC.invisibility_of_element_located((AppiumBy.CLASS_NAME, "[label | Loading…]"))
    )
    # Rest of code
Testing and asserting
So far, we have seen how to interact with GUI elements, but we haven't tested anything yet.
Generally, tests assert whether the performed action was successful or not. This is done by using the Python unittest module's assert methods. The most common methods are:
# a == b
assertEqual(a, b)
# a != b
assertNotEqual(a, b)
# bool(x) is True
assertTrue(x)
# bool(x) is False
assertFalse(x)
# member is in container
assertIn(member,container)
# member is not in container
assertNotIn(member, container)
A common pattern used in KDE software is to write a getresults() function
that retrieves a property from a certain element. This is useful for when
multiple UI elements are handled and the result culminates into a single
element. The standard calculatortest.py provided with Selenium AT-SPI
is an example of this, with the input of multiple calculator keys being probed
before checking the result in the text field:
def getresults(self):
    displaytext = self.driver.find_element(by='description', value='Result Display').text
    return displaytext
Another assert pattern is used to test whether the values you get from
interacting with the application's UI matches an expected result. This can be
done with an assertResult(self, actual, expected) method. Generally you want
for the driver to have finished loading and having run the getresults() method,
so a timeout is needed.
def assertResult(self, actual, expected):
    wait = WebDriverWait(self.driver, 20)
    wait.until(lambda x: self.getresults() == expected)
    self.assertEqual(self.getresults(), expected)

def test_addition(self):
    self.driver.find_element(by=AppiumBy.NAME, value="1").click()
    self.driver.find_element(by=AppiumBy.NAME, value="+").click()
    self.driver.find_element(by=AppiumBy.NAME, value="7").click()
    self.driver.find_element(by=AppiumBy.NAME, value="=").click()
    self.assertResult(self.getresults(), "8")
Whenever a test fails, it is customary to take a screenshot of the result so
that even tests done in the
KDE CI
can be viewed by developers as downloadable artifacts. This can be achieved with
get_screenshot_as_file(filename)
in the tearDownClass() destructor:
def tearDownClass(self) -> None:
    if not self._outcome.result.wasSuccessful():
        self.driver.get_screenshot_as_file("failed_test_shot_{}.png".format(self.id()))
Now you should know everything you need to write your own Appium tests! 🎉